What Jump Showdown Boss Drops Actually Contain and Why They Matter
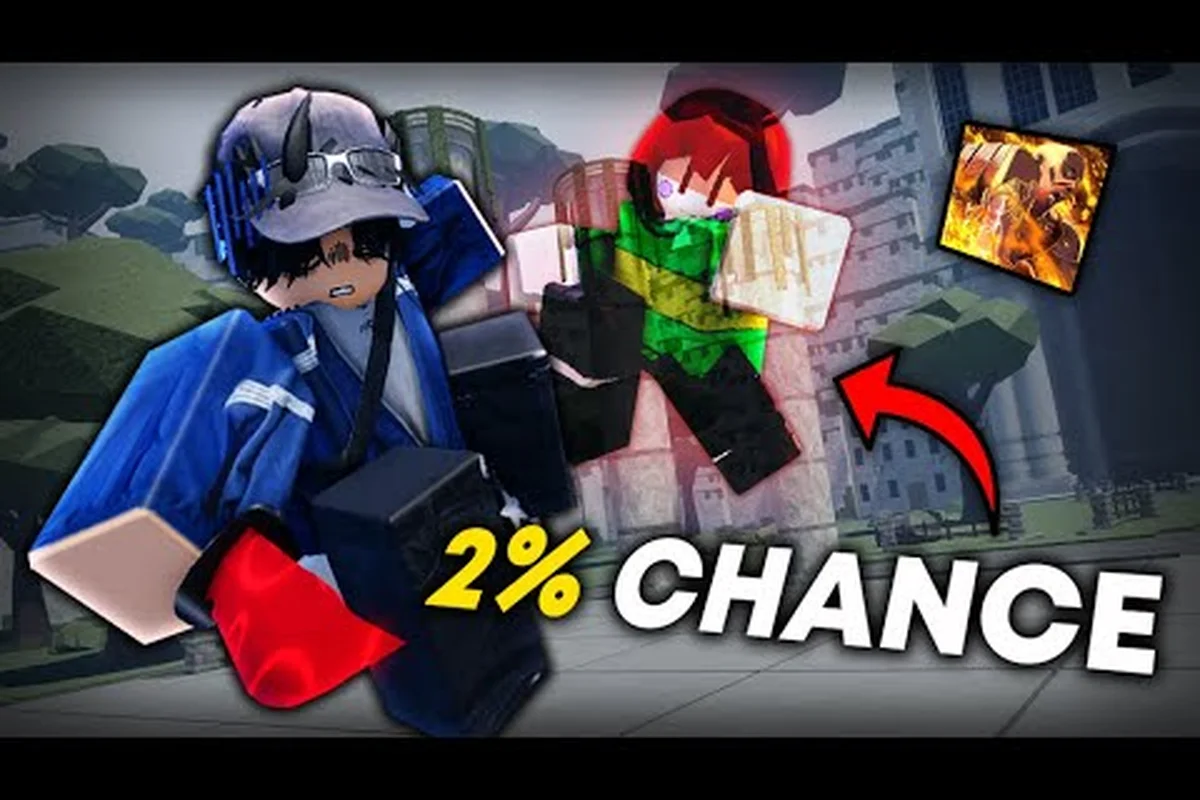
Jump Showdown boss drops are the rarest reward tier in the entire game, and chasing them without a plan is the fastest way to burn two hours on a single clear. The PvE raid loop, anchored by the Chara (Cursed Child) encounter, hands out exclusive weapon skins, lobby flex titles, and chunky XP boosts that you cannot earn anywhere else in the rotation. According to the Jump Showdown official Roblox page, world bosses spawn on a timer in dedicated arena zones, and every clear is a chance to roll one of those cosmetic-only flex items that show up next to your name in the lobby.
Players who treat boss drops like a lottery ticket almost always come away empty, while players who learn the spawn loop, the rage-mode trigger, and the cheese setup walk out with three or four drops per hour. The real value is not just the cosmetics. Boss kills contribute to the Cursed Child Badge, which gates several late-game character unlocks, and the XP boost scales with the phase you reach before wiping. If you have ever wondered why some players run around the lobby with a red "Cursed Slayer" title while you are stuck with the default rank, the answer is almost always that they finished a Phase 3 clear on a Tuesday afternoon while you were still learning how to bait the knife lunge.
The whole drops economy comes down to three levers: knowing where the boss arena sits, understanding which phases unlock which reward brackets, and choosing a character whose kit actually survives the late-game slash spam. This guide walks through each lever in order, with the exact summon ritual, the rage-mode threshold numbers, and the character matchups that players have reported work best on a solo or duo queue. If you have been grinding the regular lobby for weeks without seeing a single red-tier skin drop, the boss encounter is where you pivot next.
How to Summon Jump Showdown Bosses and Locate the Hidden Arena
Learning how to summon Jump Showdown boss encounters is a two-part problem: you have to trigger the world event, and then you have to find the cursed altar that actually pops the boss into the arena. The ritual itself is short, but a single missed step means the summoning circle never lights up and the 15-minute cooldown resets from zero. Below is the most consistent summoning flow that community testing on the Jump Showdown Discord has confirmed works across the latest patch.
Step-by-Step Summon Ritual
| Step | Action | Where It Happens | Time Gate |
|---|---|---|---|
| 1 | Wait for the global "The Air Thickens" world announcement | Lobby HUD | 12-18 min cycle |
| 2 | Travel to the City Outskirts on the far right of the map | Open-world city map | ~45 sec walk |
| 3 | Locate the Cursed Altar with a glowing red summoning circle | Hidden north of the skatepark | Visible after Step 1 |
| 4 | Stand inside the circle as a full squad of 2-4 players | Inside the red ring | No time limit |
| 5 | One player holds the interact key for 3 seconds to light the altar | Inside the ring | 3 sec channel |
| 6 | Chara (Cursed Child) spawns after a 5-second cast bar | Center of the arena | Locked once started |
The key detail most players miss is that the summoning circle is not always visible. The Cursed Altar sits in the City Outskirts past the skatepark, but it only renders the red ring during the active "The Air Thickens" event window. Outside of that window, the spot looks like an empty lot, and a lot of players report wandering the outskirts for ten minutes thinking the boss is bugged. The fix is to ignore the altar between events and just watch the HUD banner instead, because the banner and the altar visibility are tied to the same internal flag.
A second common mistake is queuing the summon with a half-dead squad. If even one teammate is in respawn cooldown when the cast bar finishes, the Chara (Cursed Child) encounter starts with the missing player automatically replaced by a low-stat NPC clone, which significantly lowers your clear rate and the drop bracket you finish in. Try to gather a full squad of at least two real players before stepping into the circle, and confirm everyone is at 100 percent HP because the Blood Slash Phase 2 opener hits for roughly 60 percent of your max HP if you fail the dodge.
Arena Map Layout
The arena itself is a small circular ring about 60 studs across, with raised pillars at the four cardinal points that double as high ground during the enrage phase. The pillars are the single most important terrain feature, because the screen-covering slashes in Phase 3 can only be dodged by standing on top of them or air-dashing off the edge of the arena. If you are playing on a low-FOV setting or have your camera locked, raise your view distance and unlock the camera before stepping in. Players who enter the arena with default settings often fail Phase 3 simply because they cannot see the slash telegraphs in time.
Boss Rage Mode Triggers, Phase Damage, and Reward Brackets
Understanding the Jump Showdown boss rage mode triggers is what separates a one-phase wipe from a clean three-phase clear with full drop rewards. The encounter is split into three distinct phases, each gated by a health bar threshold, and each phase shifts the boss's attack pattern, the arena hazards, and the reward multiplier on the drop table. The numbers below are based on community testing from the Jump Showdown Discord and player-tracked raid logs as of the September 2026 patch.
Phase Breakdown and Drop Tier
| Phase | HP Threshold | Boss Pattern | Arena Hazard | Drop Bracket |
|---|---|---|---|---|
| 1 | 100% → 60% | Knife Lunge + recovery punish window | None | Common drops, +1 guaranteed skin roll |
| 2 | 60% → 25% | Circular Blood Knives (jump/dash to dodge) | Red floor pools | Rare drops, +1 guaranteed title roll |
| 3 (Enrage) | 25% → 0% | Screen-Covering Slash Waves | High ground only | Epic drops, +1 exclusive skin roll, badge progress |
Phase 1 is the tutorial phase, but it is also where most groups wipe because they try to greed the damage instead of learning the knife-lunge recovery window. Chara (Cursed Child) lunges forward with a red telegraph line, then stands still for roughly 1.2 seconds while the knife recoils. That 1.2-second window is your full-damage window, and the best strategy is to bait two lunges, then punish with a single ultimate awakening on the third recovery. If you burn your awakening on the first lunge, you will be locked out of cooldowns for Phase 2 and your squad will likely wipe to the blood-knife ring.
Phase 2 activates the moment her health drops below 60 percent, and the arena floor starts spawning red pools that do tick damage if you stand in them. The Circular Blood Knives attack fires eight spinning blades in a horizontal ring around her, and the only consistent dodge is to jump and air-dash through the gap between two adjacent blades. Standing still or rolling on the ground will not save you, and the blades hit for about 35 percent of max HP per tick. This is also the phase where the Rage Mode meter starts to fill. Every death on your squad adds 8 percent to her rage bar, and once it hits 50 percent she skips straight to Phase 3 early. Solo players who die twice in Phase 2 can effectively skip the rest of the encounter and lose the rare drop bracket, which is why the cheese strategy below is so important for solo runs.
Phase 3 is the actual enrage, with full screen-covering slash waves that only miss players standing on the four raised pillars or air-dashing off the arena's edge. The drop bracket on a clean Phase 3 clear is the only way to roll the Cursed Dagger weapon skin and the Cursed Slayer lobby title, which is why most groups will accept a Phase 2 wipe on a learning run rather than burn the rare drop bracket on a sloppy clear. Community data from the Jump Showdown Discord suggests that roughly 1 in 6 clean Phase 3 clears rolls the Cursed Dagger, and about 1 in 12 rolls the Cursed Slayer title. The remaining clears still hand out common drops, XP boosts, and badge progress, so even a failed Phase 3 is not a complete waste.
Best Character for Jump Showdown Bosses: Gojo vs Chara Matchup
Choosing the Jump Showdown best character for bosses is less about raw damage and more about survival through Phase 3, because the enrage slash waves will one-shot any character that cannot reposition in mid-air. Three characters stand out across community testing, and each one wins in a different squad composition. The matchup below is based on raid logs from the Jump Showdown Discord and solo clear videos published on YouTube.
Top Boss Characters Compared
| Character | Mobility | Burst Damage | Phase 3 Survival | Best Squad Role |
|---|---|---|---|---|
| Unsealed Sorcerer | High (teleport + air dash) | Very High (ranged burst) | Excellent | Main DPS + Phase 3 cleanup |
| Unhinged Esper | Very High (long-range TP) | Medium (DoT stack) | Excellent | Stun-lock + support |
| Cursed Child (Chara) | Medium (slash teleport) | High (mirror damage) | Good | Phase 2 blood-knife counter |
The Unsealed Sorcerer is the community's most-recommended pick for first-time boss runs because the teleport combo lets you reset out of the Phase 3 slash waves even if your timing is off by half a second. The ranged burst is also high enough that you can contribute to phase damage from the back pillar without overextending, which is the single biggest mistake new boss runners make. If you main Gojo and want to know how he stacks up specifically against the Chara matchup, the gojo kit translates into a similar ranged pressure profile, but his domain expansion cooldown is longer and his Phase 3 dodge window is tighter. Most players running Unsealed Sorcerer clear the encounter with two deaths or fewer, while Gojo mains tend to wipe once during the Phase 3 enrage because his mobility does not chain as cleanly.
The Unhinged Esper is the safest pick for solo runs because the long-range teleport lets you stagger your ultimate awakening activations and chain a continuous boss stun lock across all three phases. Reported by players as the most consistent solo-clear character, the Esper's DoT stack is also a hidden bonus because it ticks during Phase 2 even while you are dodging blood knives, which means you can spend more time on movement and less time trying to land raw hits. The downside is that your clear times will be roughly 30 percent longer than a Gojo or Unsealed Sorcerer run, so if you are farming drops on a tight play session, the Esper is the safer choice but not the fastest.
The Cursed Child (Chara) is the thematic pick and actually counters her own boss fight because the slash teleport mirrors some of the boss's movement patterns, which makes the blood-knife ring slightly easier to read. The mirror damage passive also lets you trade hits during Phase 2 when the red floor pools are eating your HP, but the lower mobility ceiling means you still want a high-mobility teammate covering your Phase 3 dodges. If you are curious about unlocking Chara as a playable character, the unlock conditions are documented in the character roster, and the Jump Showdown Character Roster covers the full unlock path including the badge requirement from your first boss clear.
Boss Cheese Strategy: Stun-Lock, Pillaring, and the Phase Skip Trick
The Jump Showdown boss cheese strategy is not a single trick, but a layered setup that combines three mechanics: a coordinated stun-lock rotation, a pillaring exploit on the Phase 3 high ground, and an optional phase skip using the rage bar. None of these are bug abuses; they are all intentional mechanics that the developers left in the encounter, and the Jump Showdown Discord has a pinned channel walking new players through each one. Below is the most consistent version of the setup that works on both solo and duo runs.
Cheese Setup Checklist
| Trick | Phase Used | Setup Steps | Risk |
|---|---|---|---|
| Stun-Lock Rotation | 1, 2, 3 | 2+ players alternate ultimates on the 1.2s recovery window | Low (coordination only) |
| Pillaring Glitch | 3 | Stand on NW pillar, jump + air-dash on the slash telegraph | Medium (camera FOV) |
| Rage Skip | 2 | Let one squad member die intentionally to push Phase 3 early | High (drop bracket) |
The Stun-Lock Rotation is the cleanest cheese and the one you should learn first. The 1.2-second recovery window after Chara's knife lunge is long enough to land a full ultimate awakening, and if two players alternate their ultimates with even a 0.5-second offset, you can chain her in the recovery animation for the entire Phase 1. The trick is communication: call out your ultimate cooldown in the squad chat, and time your second awakening to land exactly when the first player's stun wears off. Once you and your duo partner are in sync, Phase 1 becomes a 90-second burn with zero risk, and you can save your cooldowns for the harder phases.
The Pillaring Glitch is the Phase 3 survival cheese, and it is less a glitch and more a positioning trick that most players never discover on their own. The four cardinal pillars each have a small raised lip on the north edge, and if you jump and air-dash toward the lip right as the slash wave telegraphs, you can clip into a position where the slash passes under your feet instead of through your character model. This trick requires the camera to be unlocked and at a high FOV, so unlock your camera and raise the FOV slider to 90+ before the encounter starts. Players running the cheese reliably survive Phase 3 with full HP, which means they can keep the rare drop bracket alive all the way to the kill.
The Rage Skip is the only risky cheese in the list, and you should only use it if your squad is about to wipe in Phase 2 and you want to push for the Phase 3 drop bracket before everyone dies anyway. Letting one squad member die intentionally adds 8 percent to the rage bar, and at 50 percent the boss skips to Phase 3. The downside is that you lose the rare drop bracket that Phase 2 would have unlocked, so the move only makes sense if the Cursed Dagger or Cursed Slayer title is your main target. Solo players who wipe twice in Phase 2 can also trigger the rage skip on their own, but the resulting Phase 3 clear almost always has no survivors, so it is more of a "go for the badge progress" play than a "go for the skin" play.
Frequently Asked Questions
What are the rarest Jump Showdown boss drops?
The rarest Jump Showdown boss drops are the Cursed Dagger weapon skin and the Cursed Slayer lobby title, both of which only roll on a clean Phase 3 clear of the Chara (Cursed Child) encounter. Community data from the Jump Showdown Discord puts the Cursed Dagger drop rate at roughly 1 in 6 clean clears and the Cursed Slayer title at about 1 in 12. Phase 2 clears still reward rare-tier skins and badge progress, but the exclusive cosmetics are gated to Phase 3 only.
How do I trigger the Jump Showdown boss rage mode early?
You can trigger the Jump Showdown boss rage mode early by letting squad members die during Phase 2, because every death adds 8 percent to the rage bar and the boss skips to Phase 3 once the bar hits 50 percent. The downside is that you lose the rare drop bracket from Phase 2, so this trick is only worth it if your squad is about to wipe anyway and you want to push for the Phase 3 exclusive cosmetics. Solo players can also force a rage skip by dying twice in Phase 2, but the resulting Phase 3 clear almost always wipes the squad.
Is Gojo or Unsealed Sorcerer better for the Chara boss fight?
For the Chara boss fight specifically, the Unsealed Sorcerer is the safer pick because the teleport combo gives you a wider Phase 3 dodge window, while the Gojo domain expansion cooldown is longer and his mobility does not chain as cleanly through the screen-covering slash waves. Most Gojo mains wipe once during Phase 3 on their first clear, while Unsealed Sorcerer mains usually finish the encounter with two deaths or fewer. If you already main Gojo and want to optimize the matchup, the boss battles deep dive covers the exact timing windows where his kit outperforms the Esper.
Can I solo the Chara boss in Jump Showdown?
Yes, you can solo the Chara (Cursed Child) boss in Jump Showdown with the Unhinged Esper or Unsealed Sorcerer, both of which have the mobility to chain the Phase 3 slash waves without a healer. The Unhinged Esper is the most consistent solo clear because the long-range teleport lets you stagger your ultimate awakening activations and chain a continuous boss stun lock across all three phases. The solo boss guide covers the full solo rotation in more detail, including the recommended summon timing and the drop bracket you can expect on a clean run.