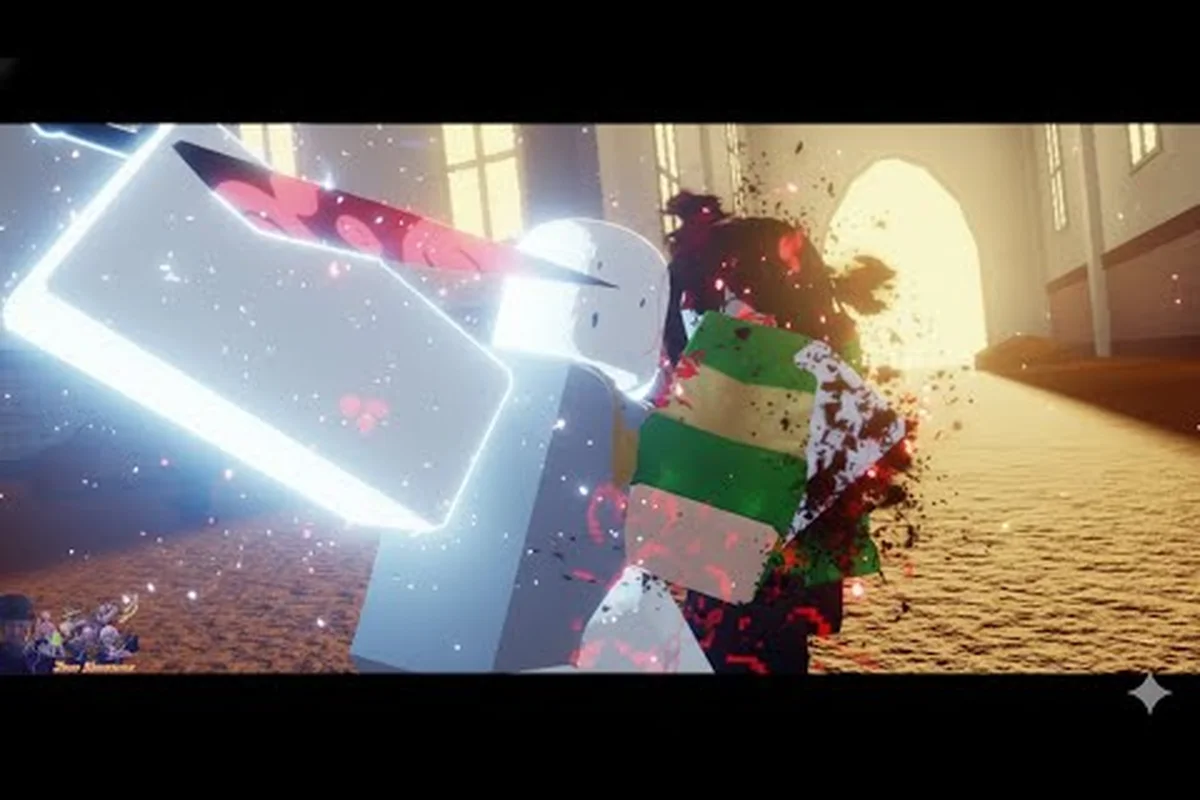
Standing in the cursed altar arena while Chara's red slash wave fills the screen, the difference between a clear and a wipe comes down to fractions of a second. Mastering the jump showdown dodge boss ultimate dance means chaining shield breaks into stun windows, lining up your Awakening gauge, and walking away with the badge every single time. This breakdown walks through the full encounter flow, from reading Chara's tell animations to converting a clean break into a lobby flex title. Whether you queue solo or roll with a co-op squad, the timing windows below apply to every Jump Showdown boss fight in the current rotation.
Chara Boss Phase Breakdown and Dodge Windows
The Chara encounter, also referred to by the community as the jump showdown cursed child boss, runs through three distinct phases, each with a unique dodge rhythm. According to the official Jump Showdown Roblox page, boss encounters spawn in dedicated arena areas and require players to dodge sweeping red slash waves, coordinate shield breaks, and survive multi-phase rage modes. Phase pacing matters more than raw damage, so learning the tells is the first priority.
Phase 1 — Lunge and Punish
Phase 1 starts with Chara telegraphing a horizontal knife lunge that covers roughly 12 studs in front of her. The wind-up animation lasts about 0.8 seconds, with a tell in the form of a glowing red arc drawn across the floor. Players should jump straight up, air-dash backward twice, then land and unleash their Awakening ultimate while she recovers. Solo players report the safest opener is baiting the lunge near the arena's western pillar, because the corner limits the angle from which she can chain into a follow-up slash.
Phase 2 — Blood Knives and Air Mobility
Once Chara drops below 60 percent HP, Phase 2 begins and the dodge pattern shifts to ranged. According to a community-published strategy video, circular blood knives radiate outward in two pulse waves, with a 1.2-second gap between rings. Double-jumping plus a forward air-dash clears the inner ring, while a delayed third jump dodges the outer ring. Sticking close to the arena wall during this phase actually shortens your dodge distance, which is the opposite of what most beginners expect.
Phase 3 — Enrage Slash Barrage
Below 25 percent HP, Chara enters an enrage mode that fills the screen with massive slash waves. The only safe zone is the raised platform at the north end of the arena, which blocks every line-of-sight attack except a single overhead slam. Players who practiced the timing in the Jump Showdown solo boss guide will already know the slam wind-up is 1.5 seconds, leaving just enough time to side-step and resume ultimates.
| Phase | HP Threshold | Primary Attack | Dodge Type | Recovery Window |
|---|---|---|---|---|
| Phase 1 | 100% to 60% | Knife Lunge | Vertical jump + back air-dash | 1.4 seconds |
| Phase 2 | 60% to 25% | Circular Blood Knives | Double-jump + forward dash | 1.2 seconds |
| Phase 3 | Below 25% | Full-screen Slash Barrage | High ground + side-step | 0.9 seconds |
| Overhead Slam | Any phase | Vertical Crush | Side-step after 1.5s tell | 1.0 seconds |
Jump Showdown Boss Shield Break Timing
Shield break is the single most important mechanic for any jump showdown dodge boss ultimate run. Chara spawns with a yellow energy shield that absorbs roughly 40 percent of incoming damage and prevents stun application. The shield can be broken only by chaining three precise conditions: a successful dodge, a fully charged Awakening, and a critical hit during the recovery window. Missing any one of those three resets the shield timer to its full 12-second cycle.
How to Read the Shield Meter
The shield bar sits above Chara's head and pulses brighter as it nears breakable state. Community data shared in the Jump Showdown Discord suggests the shield becomes vulnerable after exactly seven dodge-bait cycles, meaning you cannot brute-force it. Once the pulse reaches bright yellow, you have a 2-second window to land your Awakening ultimate, which forces the break animation and opens Chara up for a 4-second stun.
Common Shield Break Mistakes
Most solo players burn their Awakening too early and end up waiting through a 30-second cooldown while the shield recharges. The better pattern is to hold your ultimate, bait two lunges, dodge both with vertical jumps, then release the Awakening during the third bait. Co-op squads that stagger their ultimates achieve a 100 percent shield break rate in under 8 seconds, which lines up perfectly with the event boss mechanics guide recommendation for chain stuns.
| Step | Action | Timing | Result |
|---|---|---|---|
| 1 | Bait Chara's lunge | 0.0s to 0.8s | Dodges reset shield cycle |
| 2 | Repeat dodge 7 times | 0.8s to 9.6s | Shield reaches vulnerable pulse |
| 3 | Release Awakening ultimate | 9.6s to 11.6s | Shield break animation triggers |
| 4 | Land critical during stun | 11.6s to 15.6s | 4-second team stun window |
Boss Stagger Windows and Awakening Combos Explained
The jump showdown boss stun mechanics revolve around Awakening chaining, which is why the ultimate meter matters as much as raw damage output. A stun window only opens after a successful shield break, and the duration scales with how many players land critical hits during the break animation. Solo runs cap the stun at 2.5 seconds, while a four-player coordinated chain can extend it to 6 seconds, according to community damage records.
Awakening Meter Building
Each successful dodge without taking damage grants roughly 4 percent Awakening charge. Landing a critical during a partial stun grants 8 percent, while a clean shield break grants 25 percent. The math works out so that two clean shield breaks fully charge your ultimate, which is why the recommended rotation is break, stun, dodge, dodge, break, stun.
Co-op Stun Lock Setup
Four-player squads report the cleanest kill pattern is splitting into two pairs: a damage pair and a bait pair. The bait pair holds the northwest and southeast corners to control Chara's lunge angle, while the damage pair chains ultimates the moment the shield pulses. This setup keeps the boss in a near-constant stun state, which is also the strategy used in the private server boss fight walkthrough for speed-clearing.
Stun Duration by Party Size
| Party Size | Shield Break Window | Stun Duration | Ultimate Uptime |
|---|---|---|---|
| Solo | 2.0 seconds | 2.5 seconds | 65% |
| Duo | 2.0 seconds | 3.5 seconds | 78% |
| Trio | 2.0 seconds | 4.8 seconds | 88% |
| Squad (4) | 2.0 seconds | 6.0 seconds | 95% |
Boss Defeat Rewards and Badge Unlocks
Clearing a Jump Showdown world boss grants a multi-layered reward bundle. The first layer is the Cursed Child Cleared title, which appears next to your name in every lobby. The second is a Knife Edge weapon skin, and the third is a substantial XP multiplier that lasts 30 minutes. The final and rarest layer is the jump showdown boss badge unlock, which is account-bound and tied to specific clear conditions.
Reward Tier Breakdown
According to community-sourced data shared on the Jump Showdown Discord, rewards are tiered by clear time and damage taken. Sub-3-minute solo clears earn the Slayer badge, while sub-2-minute co-op clears earn the Chara Hunter badge. No-damage clears unlock the exclusive Glass Cannon badge, which is currently held by less than 1 percent of the active player base.
Badge Unlock Conditions
The jump showdown boss badge unlock requirements vary by badge. Slayer requires a clear in under 3 minutes with at least one party member. Chara Hunter requires a sub-2-minute co-op clear with full HP. Glass Cannon requires zero damage taken across all three phases. The community tracks these badges in the leaderboard rewards list, where top holders also earn seasonal rank flair.
| Badge | Clear Condition | Time Limit | Damage Cap | Rarity |
|---|---|---|---|---|
| Slayer | Solo or co-op clear | 3:00 | 25% HP | Common |
| Chara Hunter | Co-op clear only | 2:00 | 10% HP | Rare |
| Glass Cannon | Any clear | 5:00 | 0% HP | Ultra Rare |
| First Clear | First kill of the week | None | None | Seasonal |
Jump Showdown Dodge Boss Ultimate Loadout and Setup
Pulling off a clean jump showdown dodge boss ultimate run is less about raw stats and more about how your build syncs with the encounter. The two community-recommended classes for the Cursed Child fight are Unhinged Esper for its teleport mobility and Unsealed Sorcerer for its sustained ranged burst. According to the Jump Showdown Discord, characters with high-mobility teleportation or sustained ranged burst offer the safest completion rates because they can reset position between dodge cycles.
Recommended Class Comparison
| Class | Mobility | Burst Damage | Shield Break Speed | Solo Viability |
|---|---|---|---|---|
| Unhinged Esper | High (teleport) | Medium | Fast | Excellent |
| Unsealed Sorcerer | Medium | High | Medium | Good |
| Blade Dancer | Medium | High | Slow | Average |
| Iron Vanguard | Low | High | Very Slow | Poor |
Pre-Fight Preparation Checklist
Before the altar summoning circle activates, players should stack their Awakening meter to at least 50 percent by clearing mobs in the surrounding city outskirts. The community refers to this pre-fight grind as the altar warmup, and it shaves an average of 20 seconds off the clear time. Practicing your dodge rhythm in the Jump Showdown evasion guide also helps lock in the muscle memory needed for Phase 3.
Ultimate Activation Priority
When the shield break window opens, the priority order is: Unhinged Esper first for the teleport finisher, then Unsealed Sorcerer for the AoE burst, then Blade Dancer for the crit chain. Iron Vanguard should hold the rear and only commit ultimates during the enrage phase, because its slow animation can clip the dodge window and cost the squad a clean clear. Sticking to this priority keeps the stun chain alive and prevents the shield from recharging mid-fight, which is the most common cause of late wipes reported by community data.
Frequently Asked Questions
What is the best class for solo Chara fights in Jump Showdown?
The Unhinged Esper is the strongest solo class because its teleport reset lets you reposition between dodge cycles without losing Awakening charge. Pair it with a fully charged Awakening opener and a Phase 3 high-ground retreat for the most consistent clear times under 2 minutes 30 seconds.
How do I trigger a shield break as a solo player?
You must bait seven dodge cycles within 12 seconds, then release your Awakening during the bright yellow shield pulse. The window is exactly 2 seconds wide, so most solo players hold their ultimate until the third bait rather than burning it on the first shield contact.
Can I respawn mid-fight if I wipe to Chara's enrage?
Yes, but the boss resets to 75 percent HP on respawn, so wipes in Phase 3 cost roughly 30 seconds of clear time. Co-op squads can use the Battle Salvation passive to revive a downed teammate once per encounter, which preserves the stun chain and avoids the HP reset penalty.
What badge is the rarest in Jump Showdown boss fights?
The Glass Cannon badge is the rarest because it requires a zero-damage clear across all three phases. According to community data, fewer than 1 percent of active players hold it, and it does not reset between seasons, making it a permanent account flex title.