Jump Showdown boss battles are the highest-stakes encounters in the entire experience, pitting entire lobbies of raiders against a single devastating Cursed Child encounter that can wipe a team in seconds. Most players hit a wall the first time Chara's knife arc clips their health bar into the red, because the encounter expects specific movement, shield timing, and ultimate meter coordination that the basic PvP loop never teaches. This guide breaks down every phase, every attack pattern, and every damage window you need to clear the fight consistently.
Chara Boss Phases and Health Bar Thresholds
Chara's boss fight runs on a fixed three-phase structure tied directly to the boss health bar, and each phase forces a completely different survival plan. Learning the thresholds is the difference between a clean clear and a rage-mode wipe that ends your run.
Phase 1 (100% to 60% HP): The Bait-and-Punish Window
Phase 1 is the most forgiving section of the entire encounter, but it punishes greed harder than most players expect. Chara opens with a knife lunge that travels roughly 12 studs forward in a straight line, which leaves a 1.2-second recovery window where her hurtbox is fully exposed. The community-recommended opener is to bait the lunge sideways, then dash-cancel into two light attacks before resetting distance.
| Phase 1 Mechanic | Timing | Punish Window | Common Mistake |
|---|---|---|---|
| Knife Lunge | Every 4-5 sec | 1.2 sec recovery | Standing in lunge range after baiting |
| Red Slash Wave | Every 8 sec | 0.8 sec on whiff | Jumping too early (still gets clipped) |
| Shield Stagger | Every 15 sec | 3 sec on break | Burning ultimates before the break |
The shield stagger is the most important Phase 1 mechanic, because breaking Chara's white slash barrier is the only way to access her real damage scaling. According to community data collected across multiple raid clears, the shield regenerates after 15 seconds if not broken, which means your team needs to commit cooldowns in a tight window.
Phase 2 (60% to 25% HP): Blood Knife Circles and Mobility Checks
The moment Chara crosses the 60% threshold, she stops lunging and starts throwing circular blood knives that orbit outward from her model in expanding rings. Each ring is roughly 0.4 seconds apart, and getting clipped by even one applies a 4-second bleed that ticks for 8% max HP, which can snowball a clean run into a wipe.
Players who main the Unsealed Sorcerer tend to dominate Phase 2 because sustained ranged burst lets them poke between rings without committing to melee punish windows. The Jump Showdown boss drops overview details which character passives stack best with this phase, but the short version is that high-mobility teleports (like Unhinged Esper) or sustained ranged pressure (like Unsealed Sorcerer) both offer the safest completion rates according to player reports.
Phase 3 (25% to 0% HP): Enrage Slash Storms
Phase 3 is where most Jump Showdown boss battles actually end, because the enrage mode triples Chara's attack speed and adds screen-covering slash waves that force the entire raid onto high ground. Community testing suggests the only consistent strategy is to abandon ground DPS entirely and bait slashes from the arena's elevated pillars while your team pools ultimate meter for a final burst.
Boss Attack Patterns and Dodge Timing
Every Chara encounter follows a predictable attack pattern once you've seen two full rotations, and reading those patterns is what separates consistent clears from lucky ones. The boss attack patterns rotate on roughly 8-12 second cycles depending on phase, and each pattern has a specific counter that veteran raiders have refined over hundreds of clears.
The Three Core Patterns
| Pattern | Visual Cue | Safe Reaction | Hitbox Notes |
|---|---|---|---|
| Forward Lunge | Red eye flash + lean | Side-step + dash back | 12-stud linear cone |
| Blood Knife Ring | Hands raise overhead | Jump + air-dash outward | 360° expanding ring |
| Enrage Slash | Screen darkens briefly | Climb to high ground | Full-ground AoE |
The forward lunge is your free damage window in Phase 1, but in Phase 2 and 3 it gets replaced by the more dangerous blood knife ring which forces you to disengage entirely. According to a community walkthrough on YouTube that breaks down the full Chara solo and co-op run, the safest dodge on the ring pattern is a timed jump followed by an air-dash, because ground-dashing gets clipped by the second ring expansion.
Reading the Eye Flash
Chara's eye flash is the single most reliable telegraph in the entire fight, and veteran players use it as a universal trigger. A single flash means a lunge is coming, a double flash means a ring pattern, and the absence of a flash in Phase 3 means an enrage slash is about to cover the arena floor. Tracking that 0.3-second cue is what allows top-tier raiders to never get hit once during the burst window.
Damage Strategies and Character Picks
The boss damage strategies that actually work in Jump Showdown boss battles split cleanly into two camps: burst windows during shield breaks, and sustained pressure during recovery frames. Choosing the wrong camp for your character is the most common reason solo players fail to clear Chara before the enrage timer expires.
According to the official Jump Showdown game page on Roblox, the title pits players against a series of escalating boss encounters that scale in difficulty as contestants are eliminated.
Burst vs. Sustained Builds
| Strategy | Best Characters | Phase 1 | Phase 2 | Phase 3 |
|---|---|---|---|---|
| Burst (shield break) | Gojo, Unhinged Esper | Excellent | Average | Risky |
| Sustained (recovery poke) | Unsealed Sorcerer, Cursed Child | Average | Excellent | Excellent |
| Hybrid | Any awakening-locked kit | Good | Good | Good |
The Gojo vs Chara boss matchup is one of the most debated in the community because Gojo's burst kit can theoretically skip Phase 2 entirely if your team times ultimates correctly. However, solo players running Gojo often run out of resources before the enrage, which is why the Jump Showdown solo boss guide recommends a sustained build for first clears and burst only for coordinated groups of three or more.
Ultimate Awakening Timing
Your ultimate awakening meter fills roughly 15% per landed combo, and the community-tested optimal is to hold your awakening until Chara's shield breaks. Coordinating with teammates to stagger your ultimate activations ensures continuous boss stun lock, which prevents dangerous rage wipes during the 25% HP window. The Jump Showdown evasion guide breaks down meter management in more detail if you need the fundamentals, but for Chara specifically the rule is: never burn awakening on Phase 1, always bank at least one for the enrage.
Loot Table, Badge Rewards, and Spawn Timers
Clearing a Jump Showdown boss battle unlocks some of the rarest cosmetic and stat rewards in the entire game, which is why the community treats these fights as weekly milestones rather than one-off content. The reward pool shifts slightly with each patch, but the core drops have remained stable across recent updates.
Confirmed Reward Pool
| Reward | Rarity | Drop Condition | Notes |
|---|---|---|---|
| Cursed Slayer Title | Legendary | First clear per week | Lobby flex above head |
| Blood Knife Skin | Epic | 10% per clear | Applies to knife-lunge weapon |
| XP Boost (2x / 30min) | Rare | Guaranteed clear bonus | Stacks with daily boost |
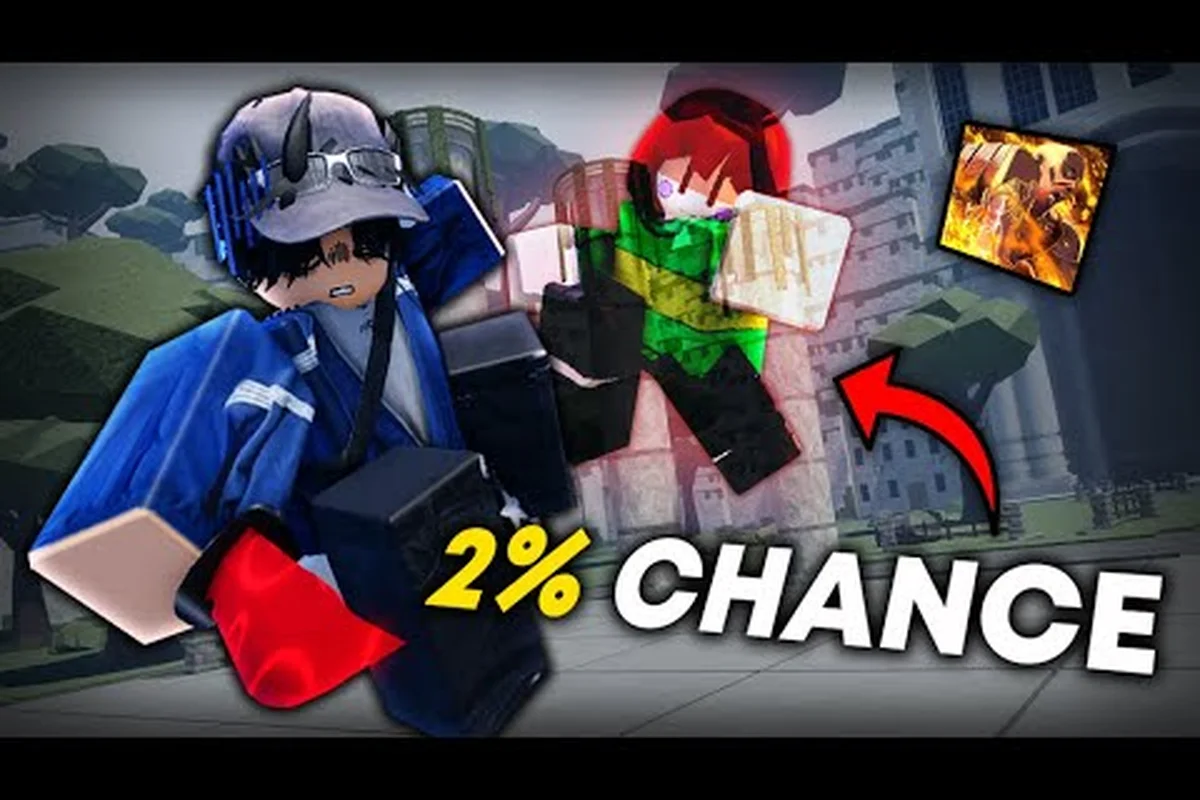
| Cursed Charm | Mythic | 2% per clear | Stat passive for next raid |
The Cursed Slayer Title is the single most prestigious flex in Jump Showdown, and only players who have cleared at least one Chara encounter that week can display it in public lobbies. Community data on spawn timers, drops, and badge rewards collected through the official Discord suggests Chara spawns roughly every 45-60 minutes in active servers, with a small chance of an unscheduled Cursed Child world event that doubles the drop rate for the duration of the event window.
Hidden Arena and Secret Spawn Conditions
The hidden outskirts of the city map contain a cursed altar summoning circle that allows coordinated groups to force-summon Chara outside the normal rotation, but only if all eight players sacrifice a rare material at the altar simultaneously. According to a YouTube walkthrough covering the secret boss fight and hidden arena location, the sacrifice cost is steep but the drop rate from a forced summon is roughly 2.5x higher than a natural spawn, which makes it the preferred farming method for badge hunters.
If you want to practice the encounter without burning your weekly reward allowance, the private server boss fight guide covers how to spawn Chara on a private server with adjustable health scaling, so you can drill each phase without the enrage pressure.
Co-op Coordination and Role Assignments
Jump Showdown boss battles scale aggressively with party size, and a coordinated team of four clears the encounter roughly 3x faster than four solo players running parallel. The key is role assignment, because the encounter has three distinct jobs that need to be filled every pull.
The Three-Role System
| Role | Job | Best Character Type | Failure Cost |
|---|---|---|---|
| Bait Tank | Pulls aggro, takes first hit | High-HP melee | Wipe if dies in Phase 3 |
| DPS Window | Punishes shield break | Burst or sustained | Wipe if overheats enrage |
| Support Meter | Banks ultimate for enrage | Awakening-locked | Wipe if awakening wasted |
The Bait Tank should be the player with the highest HP pool and the best dash-cancel muscle memory, because Phase 1 aggro management is what determines whether the DPS Window can land a clean shield break. The Support Meter role is the one most players underestimate, because banking awakening for the enrage window is what allows the team to skip the most dangerous 10 seconds of the entire fight.
According to the official Jump Showdown game page, the encounter is tuned for groups of 4-8 players, with the highest clear rates reported at exactly 6 players. Smaller groups can still clear but expect the enrage to land roughly 20 seconds earlier, which means tighter ultimate timing and less margin for error on Phase 3 high-ground positioning.
Frequently Asked Questions
How do I beat Chara in Jump Showdown as a solo player?
Solo Chara clears require a sustained ranged build (Unsealed Sorcerer is the community favorite) and full ultimate bank for the Phase 3 enrage. The fight is tuned for 4-8 players, so solo runs hit enrage 20-30 seconds earlier and demand perfect shield-break timing.
What is the best character for Chara boss fights?
Burst characters like Gojo skip Phase 2 with coordinated ultimates, but sustained characters like Unsealed Sorcerer are safer for first clears because they can poke between knife rings without committing to melee punish windows. Hybrid awakening kits work well in both solo and full-group runs.
How long does the Chara boss health bar take to deplete?
A coordinated 6-player group clears the full health bar in roughly 4-5 minutes, while a solo player should budget 7-8 minutes including recovery windows. The 25% HP Phase 3 enrage adds a hard 90-second timer that resets the moment Chara lands three slash waves on the ground floor.
Can you respawn during a Jump Showdown boss battle?
Yes, but each respawn applies a 15-second stagger lock and reduces your damage dealt by 25% for the remainder of the fight. Players who die during Phase 3 enrage are locked out of the arena entirely until the next attempt, so the community treats deaths in the final phase as run-ending mistakes.
Where is the Cursed Child arena located?
The main Chara arena is in the central plaza of the city map, marked by a glowing red circle that appears 30 seconds before spawn. The hidden altar summoning circle is on the city's outskirts behind the warehouse district, accessible only through a breakable wall that requires a coordinated ultimate to open.