
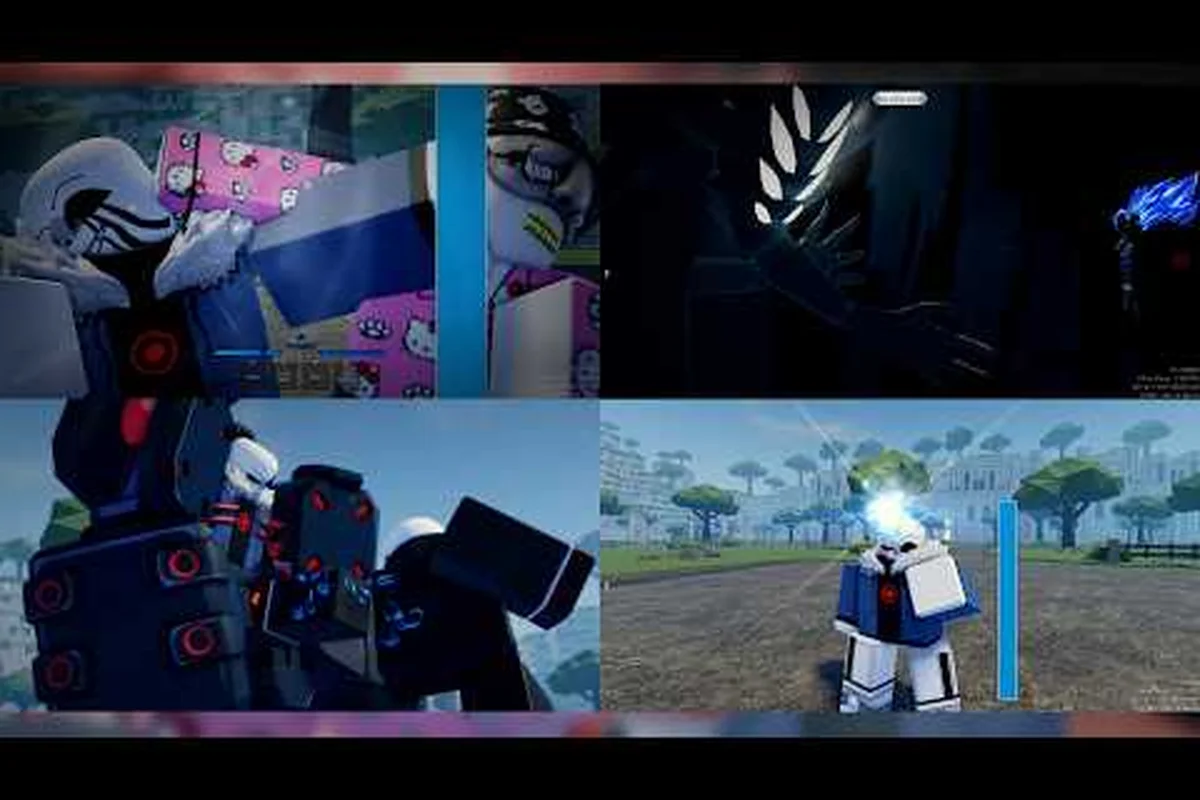
Vector Grasp is one of the highest-pressure melee kits in Jump Showdown, built around a tug-style opener that bends the opponent's guard before you commit to a hard-hitting burst string. According to the official Jump Showdown page on Roblox, every kit ships with four active skills bound to keys 1-4, plus a passive layer and an Awakening ultimate on G, which is why the Vector Grasp identity feels closer to a wrestling-pressure spec than a raw projectile duelist. This guide breaks the kit down move by move, then shows how Power Display, Self Defense Rush, Salt Punch, Get a Job You Bum, 1000 Percent Exorcism, and Chaos Barrage chain together inside a real round. From there, the same combo discipline shows up in Jump Showdown Hollow Nuke, where raw duelist pressure is converted into a one-shot burst through identical buff-then-strike sequencing.
Vector Grasp Kit Overview and Input Map
Vector Grasp rewards opponents who respect your space, and punishes those who mash buttons on reaction. The kit is mapped across keys 1-4 with the Awakening follow-up on G, and every ability has a distinct cooldown, block interaction, and guard-break flag that you need to internalize before you start fishing for combos. According to community frame data documented on the Jump Showdown Discord, Vector Grasp's pull move has a 12-frame startup that bypasses standard F blocks, which is the single most important timing window in the entire kit.
| Slot | Move | Approx. Cooldown | Blockable? | Guard-Break Flag | Best Use |
|---|---|---|---|---|---|
| 1 | Vector Grasp (Pull) | 14s | No (bypasses F) | Soft vacuum on hit | Starter / opener |
| 2 | Power Display | 18s | Yes (F holds) | Stun on parry | Mid-string carry |
| 3 | Self Defense Rush | 10s | Yes | Hyper armor on startup | Whiff punish |
| 4 | Salt Punch | 22s | No (guard-break) | Hard break | Combo ender / pressure reset |
| G | 1000 Percent Exorcism (Awakening) | Meter gated | Unblockable while awakened | Full armor | Round closer |
The Passive layer for Vector Grasp grants a small chunk of meter on every successful grab, which feeds the Awakening bar faster than ranged kits, while the Awakening follow-up 1000 Percent Exorcism converts that stored meter into a cinematic unblockable that ends 1v1 rounds in one read. Treat the kit like a grappling game: skill 1 is the hook, skill 2 extends the catch, skill 3 covers the gaps, and skill 4 closes the round, with the Awakening as the kill switch.
Cooldown and Meter Math
Vector Grasp's worst nightmare is a long stalemate where the opponent keeps blocking and resetting to neutral, because the kit's longest cooldowns sit on the moves that actually break guards. Salt Punch at 22s and Power Display at 18s both demand respect, but if you burn them into a passive turtle you will be stuck in filler for nearly a quarter of a minute. Track your Awakening bar on the HUD and only commit to the longer cooldowns when the meter is at least two-thirds full, because 1000 Percent Exorcism refunds the opportunity cost of the heavy hitters and lets you cycle back to the opener immediately.
Power Display as the Carry String
Power Display is the mid-string extender that turns a single Vector Grasp hit into a 40-50% health swing when used correctly. It is a blockable projectile-and-slam hybrid, which means a patient opponent on F will deny the damage, but on whiff or on a hit confirm it functions as a chain link into your heaviest hitters. According to community testing shared on the Jump Showdown frame data database, Power Display's parry window sits inside a tight 6-frame window, so the move is not a panic button; it is a read.
Confirming Off the Pull
The standard route is Vector Grasp (1) into Power Display (2) into Salt Punch (4), which delivers roughly 48% combined damage on a non-Awakened opponent. The trick is that Power Display only chains on a grounded or hit-stunned target, so you cannot throw it raw from neutral against a mobile duelist. Wait for the pull animation to land, then input skill 2 within three frames of the impact, and the slam portion will track the opponent's ragdoll and launch them into the Salt Punch arc automatically. If Power Display is on cooldown, substitute Chaos Barrage from your kit layer as a filler link because it shares the same block pressure profile and refunds slightly more meter on whiff thanks to its multi-hit nature.
| Hit Confirm Route | Damage % (community est.) | Meter Gained | Notes |
|---|---|---|---|
| 1 → 2 → 4 | ~48% | 22% | Standard carry, requires grounded target |
| 1 → 2 → G (Awakening) | ~75% | Spends bar | Use when bar ≥80% |
| 1 → 3 → 2 → 4 | ~55% | 28% | High-skill route, self-heal on skill 3 hit |
| 1 → filler M1 → 4 | ~30% | 14% | Safe low-commit confirm |
Notice how the 1-2-G route costs a fully charged Awakening bar in exchange for a 75% burst; that is the 1000 Percent Exorcism finisher route, and it is what makes Vector Grasp terrifying once the meter is online. Players running the kit at a competitive level usually commit to Awakening only when they have a confirmed Vector Grasp pull already in the bag, because the Awakening window is short and you do not want to spend it fishing.
Salt Punch and Get a Job You Bum Pressure
Salt Punch is the guard-break ender that defines Vector Grasp's identity in long sets. It costs 22 seconds on the meter, it ignores F blocks entirely, and on a clean hit it launches the opponent high enough to chase with an aerial M1 string or a follow-up Chaos Barrage. Get a Job You Bum is the taunt-style pseudo-move that costs nothing but a chunk of meter; it has no damage value, but it forces a long recovery animation on the user and refunds Awakening meter at a higher rate than any other interaction in the kit, which is why experienced players taunt right after a hard read.
When to Burn Salt Punch
The temptation is to throw Salt Punch the moment it comes off cooldown, but the move has a 14-frame startup that is highly punishable on whiff against fast ranged kits. The disciplined approach is to use Salt Punch as a response to three specific situations: after a blocked Power Display where the opponent is locked in parry recovery, after a successful Vector Grasp pull into a Power Display carry, and as a wakeup option against opponents who tech-roll toward you expecting a grab. In all three cases the opponent either cannot block, cannot move, or is locked in recovery, which converts Salt Punch from a coin-flip into a guaranteed break.
| Salt Punch Trigger | Opponent State | Hit Confirm Available? |
|---|---|---|
| After blocked Power Display | Parry recovery | Yes (M1 chase) |
| After 1-2 carry | Launched | Yes (aerial reset) |
| Wakeup vs roll-in | Tech roll | Yes (4 → M1) |
| Raw from neutral | Anything | No (high punish on whiff) |
Get a Job You Bum fits best as a post-round flex or as a meter accelerator after a long neutral exchange where neither player has committed Awakening. The taunt gives back roughly 6-8% of the Awakening bar depending on how recently you took damage, and it forces the opponent to make the first move on the next round's opening. Pairing the taunt with an immediate Vector Grasp read on the opponent's wakeup is a top-tier way to start round two, because the meter boost tips the Awakening race in your favor.
Self Defense Rush as a Whiff Punish
Self Defense Rush is Vector Grasp's panic button, panic heal, and i-frame dash rolled into one skill bound to key 3. It costs only 10 seconds on the meter, has hyper armor on the first 8 frames of startup, and heals a small chunk of health when it connects with an opponent's M1 or skill startup. According to player reports compiled on the Jump Showdown subreddit, Self Defense Rush also grants a brief invulnerability window during the dash itself, which means it doubles as an emergency escape against big Awakening ults like opposing 1000 Percent Exorcism casts.
Trading Windows and Health Recovery
The self-heal on Self Defense Rush is small, around 4-6% of your max health per successful trade, but the value compounds over a long set because you can absorb an opponent's aggressive opener, heal through the trade, and then counter-punish with Salt Punch while they are still in the whiff animation. This is the core identity of the kit: take a small hit, heal it back, then break their guard on the way out. The community calls this the "Reverse Cursed" loop because of the heal-then-punish rhythm, and it is what makes Vector Grasp viable in longer sets against aggressive duelists who refuse to block.
| Matchup Type | Self Defense Rush Value | Recommended Follow-up |
|---|---|---|
| Hyper-aggressive M1 masher | High (4-6% heal) | Salt Punch on whiff |
| Awakening spammer | High (i-frame dodge) | Vector Grasp on recovery |
| Zoning projectile kit | Low (no trade available) | Block and wait for approach |
| Mirror (Vector Grasp vs Vector Grasp) | Medium (race to Awakening) | Taunt into pull read |
When the matchup is against a zoning kit, Self Defense Rush falls off because there is nothing to trade with, so save the cooldown for the moment the zoner commits to a gap-closing skill. For mirror matches the i-frame window is the only thing that lets you survive an opponent's Awakening chain, so treat Self Defense Rush as a budget Awakening-dodge in mirror games.
Awakening Route: 1000 Percent Exorcism and Chaos Barrage
The Awakening turn for Vector Grasp is where the kit transitions from pressure grappler into cinematic executioner. According to the official kit catalogue on the Jump Showdown page, Awakening triggers when the meter glows gold and pressing G consumes the bar in exchange for enhanced base stats, modified M1 animations, and four upgraded ultimate techniques, with 1000 Percent Exorcism being the signature closer. While awakened, your M1s deal bonus damage and chain longer, and your skill cooldowns are reduced by roughly 20%, which means the entire Power Display, Salt Punch, Chaos Barrage, and Self Defense Rush cycle becomes a nonstop pressure engine.
The Standard Awakening Burst
The most consistent Awakening route is 1000 Percent Exorcism (G) into immediate Vector Grasp (1) into Power Display (2) into Salt Punch (4), which on a clean read deletes roughly 85-90% of an opponent's health bar in a single awakened string. The order matters: 1000 Percent Exorcism sets up the unblockable vacuum, the awakened Vector Grasp pulls the opponent through the vacuum into a grounded state, the awakened Power Display slams them into a launch, and the awakened Salt Punch catches the launch for the final hit. Chaos Barrage enters as a meter-refund filler between the Awakening cast and the follow-up pull, because its multi-hit nature stacks meter recovery on whiff and it can also be used as a standalone Awakening extender if the 1000 Percent Exorcism read is not available.
| Awakening Step | Move | Purpose | Meter Effect |
|---|---|---|---|
| Open | 1000 Percent Exorcism (G) | Unblockable vacuum | Spends Awakening bar |
| Link 1 | Chaos Barrage (filler) | Multi-hit meter refund | +6% on hit |
| Link 2 | Vector Grasp (1) | Re-grab through recovery | +8% on hit |
| Link 3 | Power Display (2) | Launch confirm | +5% on hit |
| Close | Salt Punch (4) | Final break | +7% on hit |
| Flex | Get a Job You Bum | Meter boost | +8% bar refill |
Get a Job You Bum also has a hidden interaction while awakened: the taunt's meter refund is doubled during the Awakening window, which means a clean read of pull into taunt into 1000 Percent Exorcism can effectively chain two Awakenings back-to-back if the first Awakening generates enough meter on its own burst. The community refers to this as the "Exorcism Loop" because the meter cycles from empty to full in roughly 18 seconds of awakened pressure, which is shorter than Salt Punch's own cooldown.
Defensive Awakening Usage
Not every Awakening needs to be offensive. When you are behind on health and the opponent is sitting on a primed Awakening of their own, casting 1000 Percent Exorcism as a deterrent is sometimes the correct read because the unblockable vacuum forces the opponent to either block and lose Awakening meter, or to interrupt and risk the trade. The awakened state also boosts the i-frame window on Self Defense Rush, which means a player who is behind can use Awakening defensively to dodge an opponent's burst, heal through the trade, and then counter with a Salt Punch on the way out. According to the Jump Showdown Discord, the defensive Awakening play is a high-skill route that wins tournament sets, but it requires precise cooldown tracking because you are spending the bar without landing a confirm.
Matchup Table and General Strategy
Vector Grasp is not a one-size-fits-all kit. It thrives against aggressive M1 mashers and struggles against patient zoning kits, with the mirror match being a meter race that rewards whoever lands the first Awakening. The table below summarizes the high-level game plan for the four most common matchup archetypes you will face in the public lobby.
| Matchup | Win Condition | Skill Priority | Awakening Timing |
|---|---|---|---|
| Aggressive M1 kit | Trade with Self Defense Rush, punish with Salt Punch | 3 → 4 → 1 | Defensive (dodge burst) |
| Zoning projectile kit | Wait for approach, pull into carry | 1 → 2 → 4 | Offensive (commit on approach) |
| Heavy Awakening kit | Bait Awakening, punish recovery | 1 → 4 → 3 | Defensive (dodge) then offensive (punish) |
| Mirror (Vector Grasp) | Taunt meter race, first Awakening wins | Taunt → 1 → G | Immediate on first bar |
| Grappling kit (other) | Outrange the pull, punish with aerial | 4 → 1 → 2 | On confirmed pull |
Against zoning kits, Vector Grasp's only real opener is the Vector Grasp pull because the rest of the kit is short-ranged and blockable, so commit to closing the gap with 1 and only use Power Display, Salt Punch, and Self Defense Rush once you have a confirm. Heavy Awakening kits can be baited by holding the meter at 90% and waiting for the opponent to commit 1000 Percent Exorcism, then punishing the post-Awakening recovery with your own Salt Punch because their defensive stats drop the moment the Awakening window ends. Mirror matches collapse into a meter race where the player who lands the first Get a Job You Bum taunt usually wins the Awakening race by 4-6 seconds, so do not be afraid to taunt aggressively in mirror games because the meter refund is worth the recovery animation risk.
Frequently Asked Questions
What is the best starter combo for Jump Showdown Vector Grasp?
The most reliable starter is Vector Grasp (1) into Power Display (2) into Salt Punch (4), which lands roughly 48% damage on a non-Awakened target when the pull confirms. It is blockable on the Power Display link, so only commit after the pull animation has visibly connected. Practice the timing in the training dummy room until the 2-input lands within 3 frames of the pull impact.
When should I burn 1000 Percent Exorcism as an opener?
Use 1000 Percent Exorcism as an opener only when the Awakening bar is at or above 80% and you have a read on the opponent's wakeup direction. The Awakening is unblockable, but it has a 16-frame startup that is dodgeable on reaction, so do not spam it from neutral in higher-Elo lobbies. Pair it with a preceding Get a Job You Bum taunt to maximize the meter refund chain into a follow-up Awakening if the first cast does not close the round.
Is Self Defense Rush worth using against zoning kits?
Self Defense Rush is a low-value pick against pure zoning because there is no projectile trade to absorb and the heal window never triggers. Save the cooldown for the moment the zoner commits to a gap-closing skill like a dash or an Awakening, then trade the i-frames for a heal and counter with Salt Punch on the way out. Against aggressive M1 mashers the same move is mandatory because it is your only consistent health recovery option in the kit.
How does Get a Job You Bum actually work in a real round?
Get a Job You Bum is a meter-refund taunt that costs nothing but your recovery frames and grants 6-8% of the Awakening bar back, with the refund doubled during the Awakening window itself. The taunt is best used after a hard read, between rounds, or right after a blocked Salt Punch where the opponent is too far to punish the recovery. Do not throw it raw into a neutral exchange because the 2-second recovery animation is highly punishable by fast M1 chains.
Can I counter an opponent's 1000 Percent Exorcism with Self Defense Rush?
Yes, Self Defense Rush grants i-frames during the dash portion of the move, and according to community testing the i-frame window is long enough to dodge a fully charged 1000 Percent Exorcism cast that starts within 4 frames of your input. The trade is that you spend 10 seconds of cooldown and you do not heal, so use the i-frames purely as an escape route and counter on the recovery. Against top-tier Awakeners this is the only consistent counter in the Vector Grasp kit, which is why the cooldown is so short relative to the rest of the moveset.